
Appearance
Step 7: Configure Application
After installation, Snowsight opens the Geo Data Connector configuration wizard. The wizard has two steps — External connections and Object access privileges — shown in the left sidebar. Both are marked as optional, but you should complete them to enable all Connector features.
Review External Connections
The first page shows the External connections configuration. The Connector requires an external access integration to connect to the Smart Data Hub API for data discovery, ingestion, and notifications. Click Review to inspect the connection details.
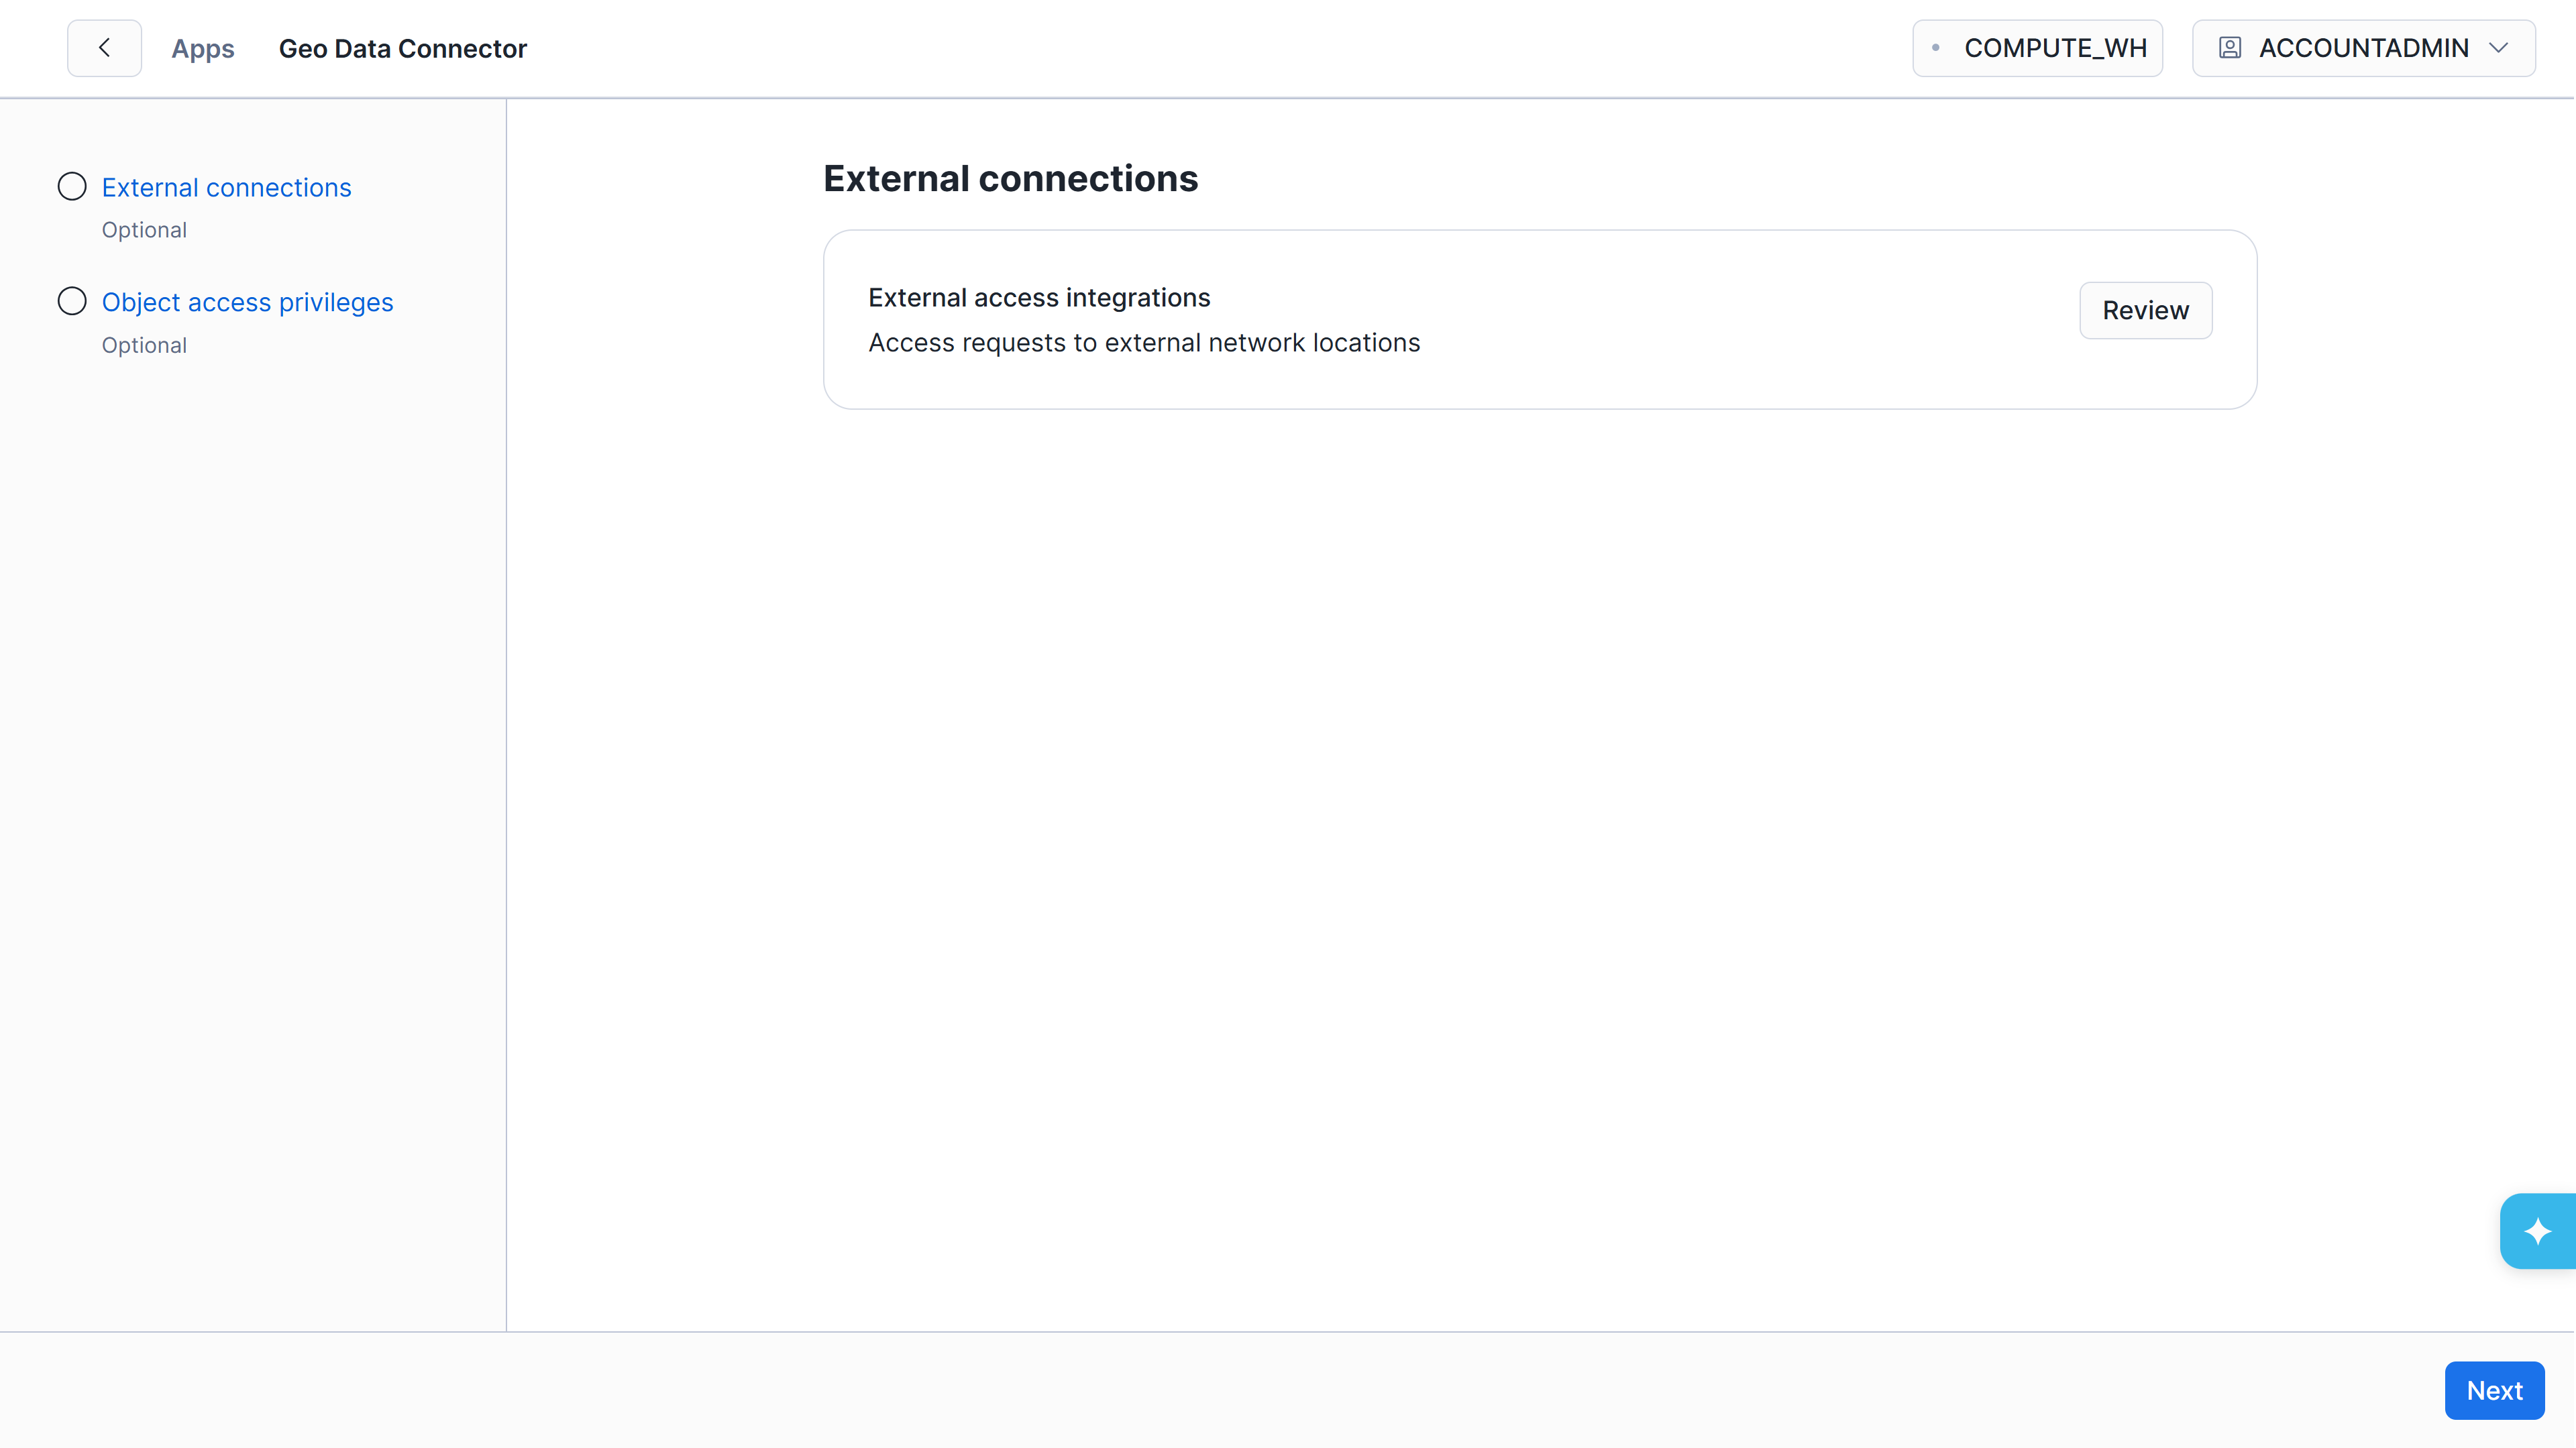
External connections page with the External access integrations item and Review button
In the dialog, verify that the Smart Data Hub API Connection toggle is enabled, then click Save.
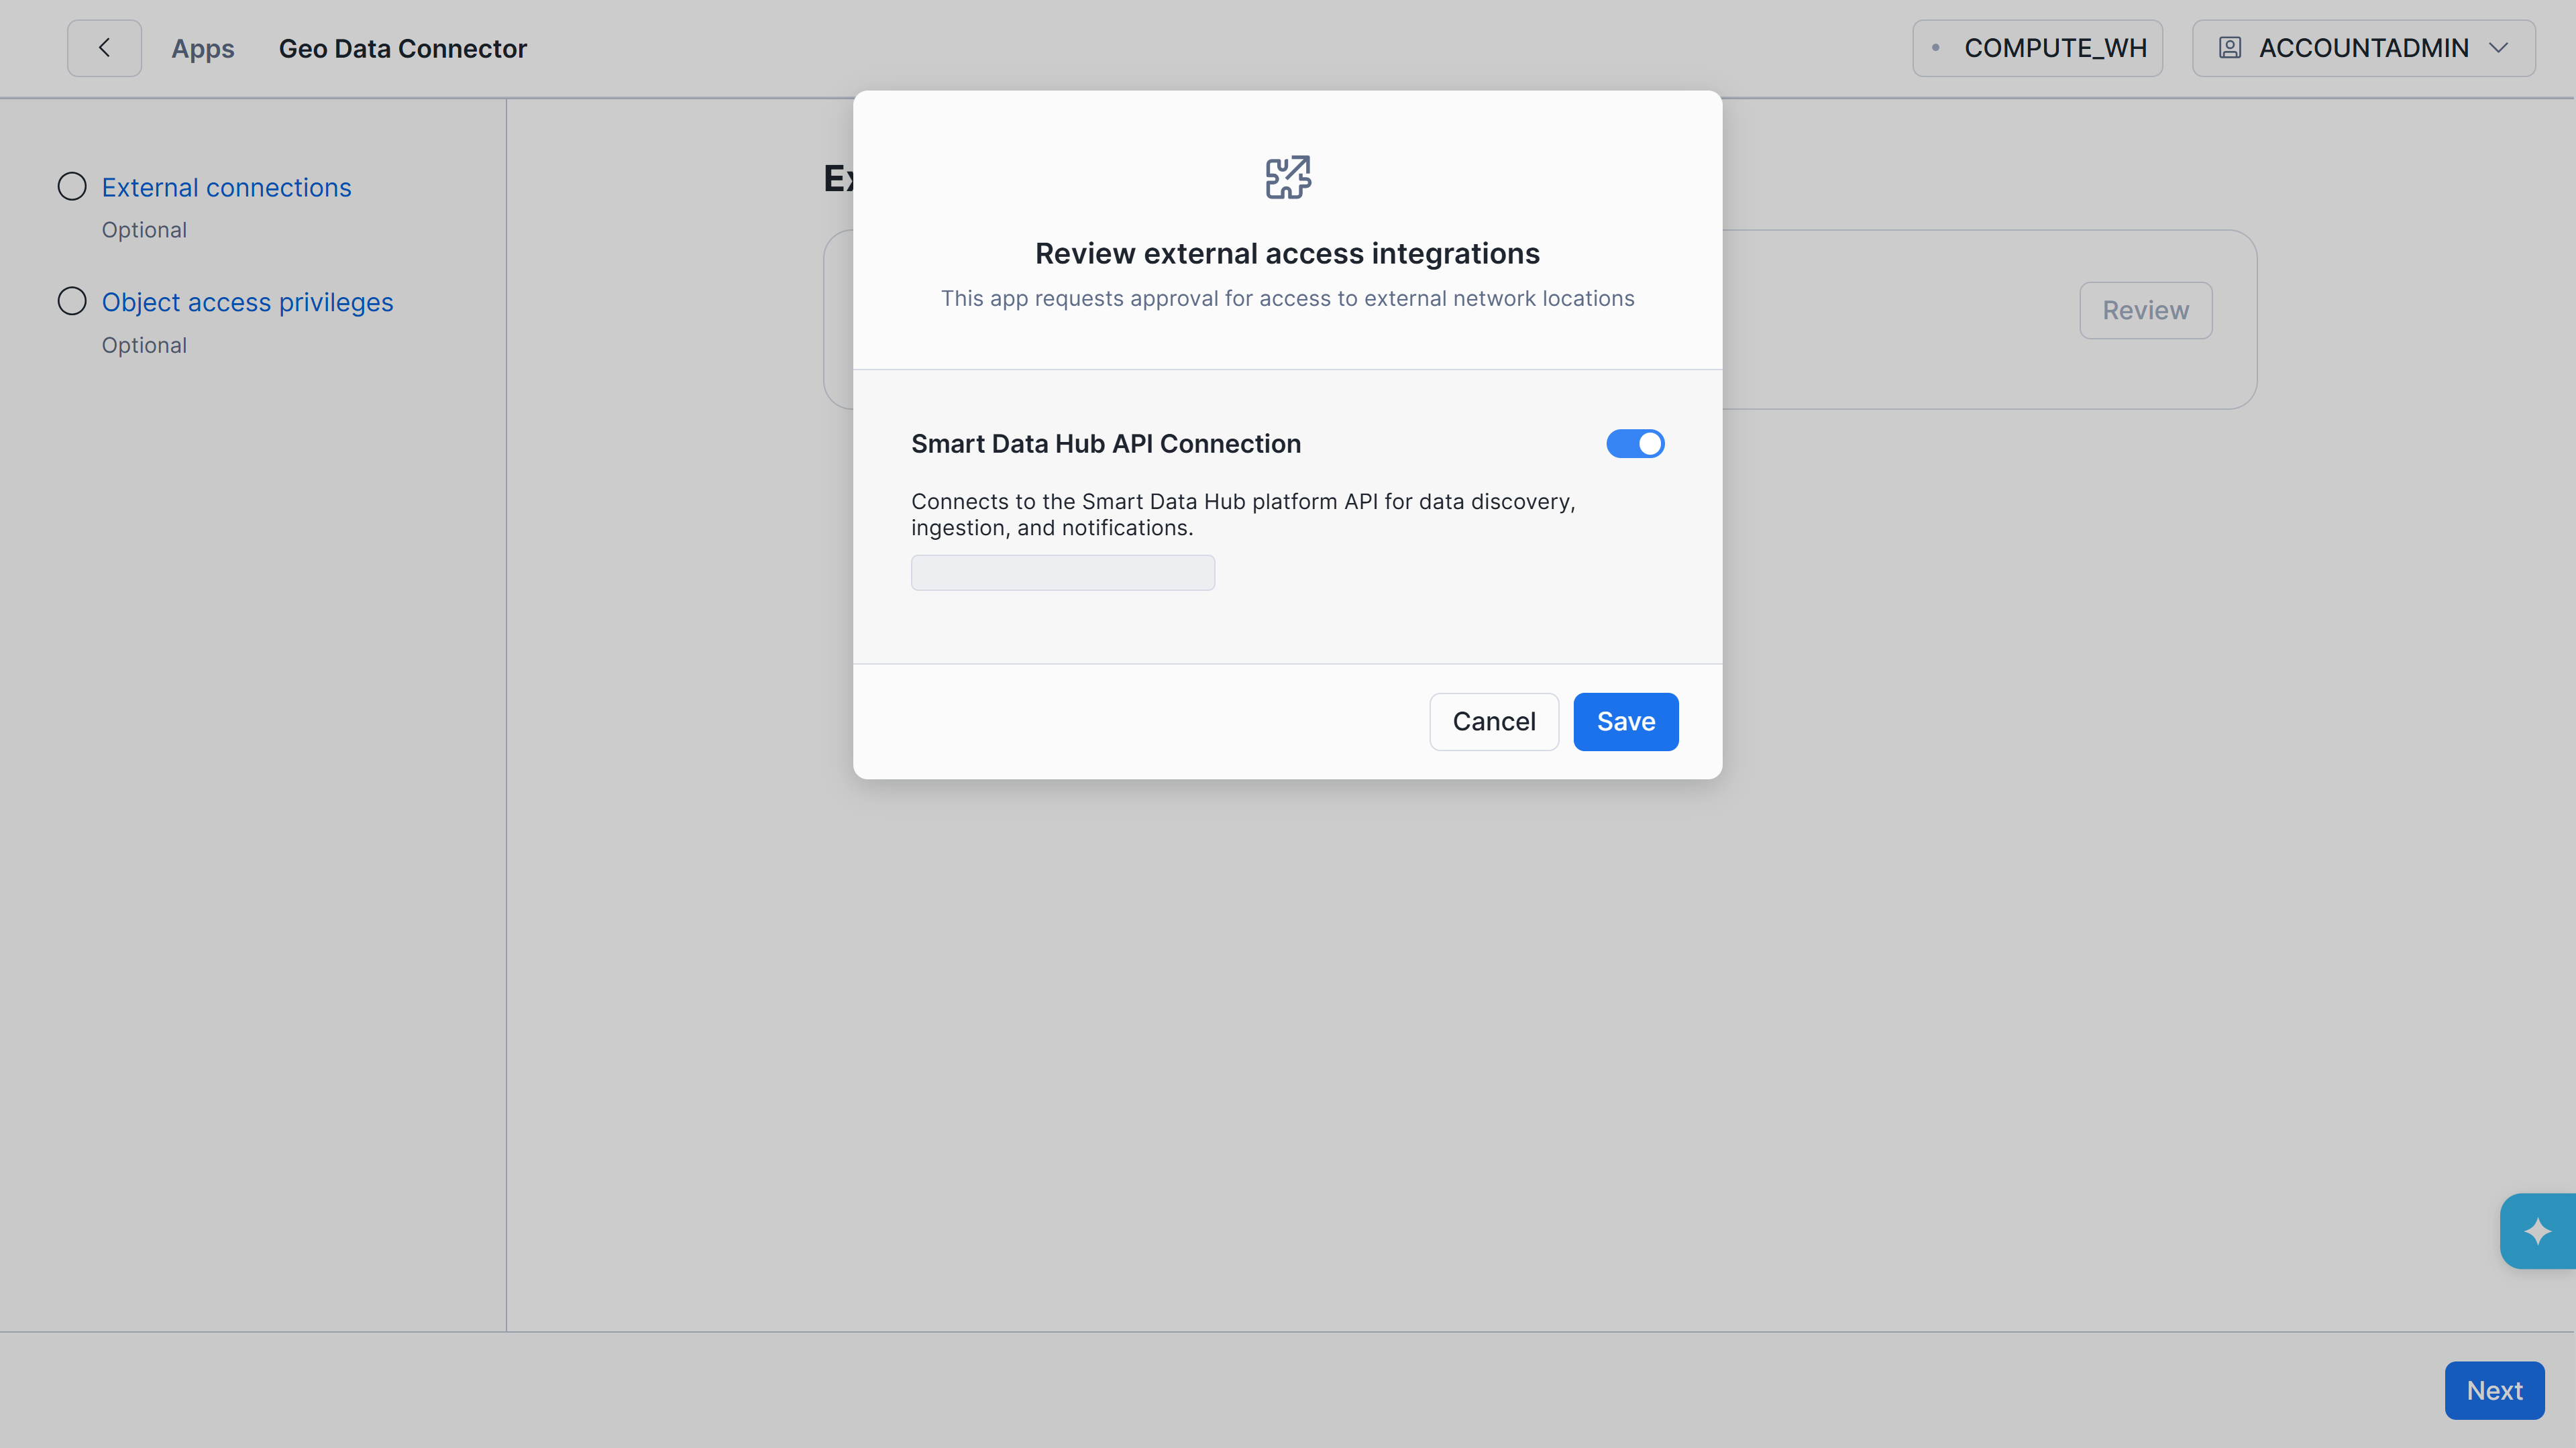
Review dialog showing the Smart Data Hub API Connection toggle
After saving, the external access integration shows a Reviewed badge. Click Next to continue.
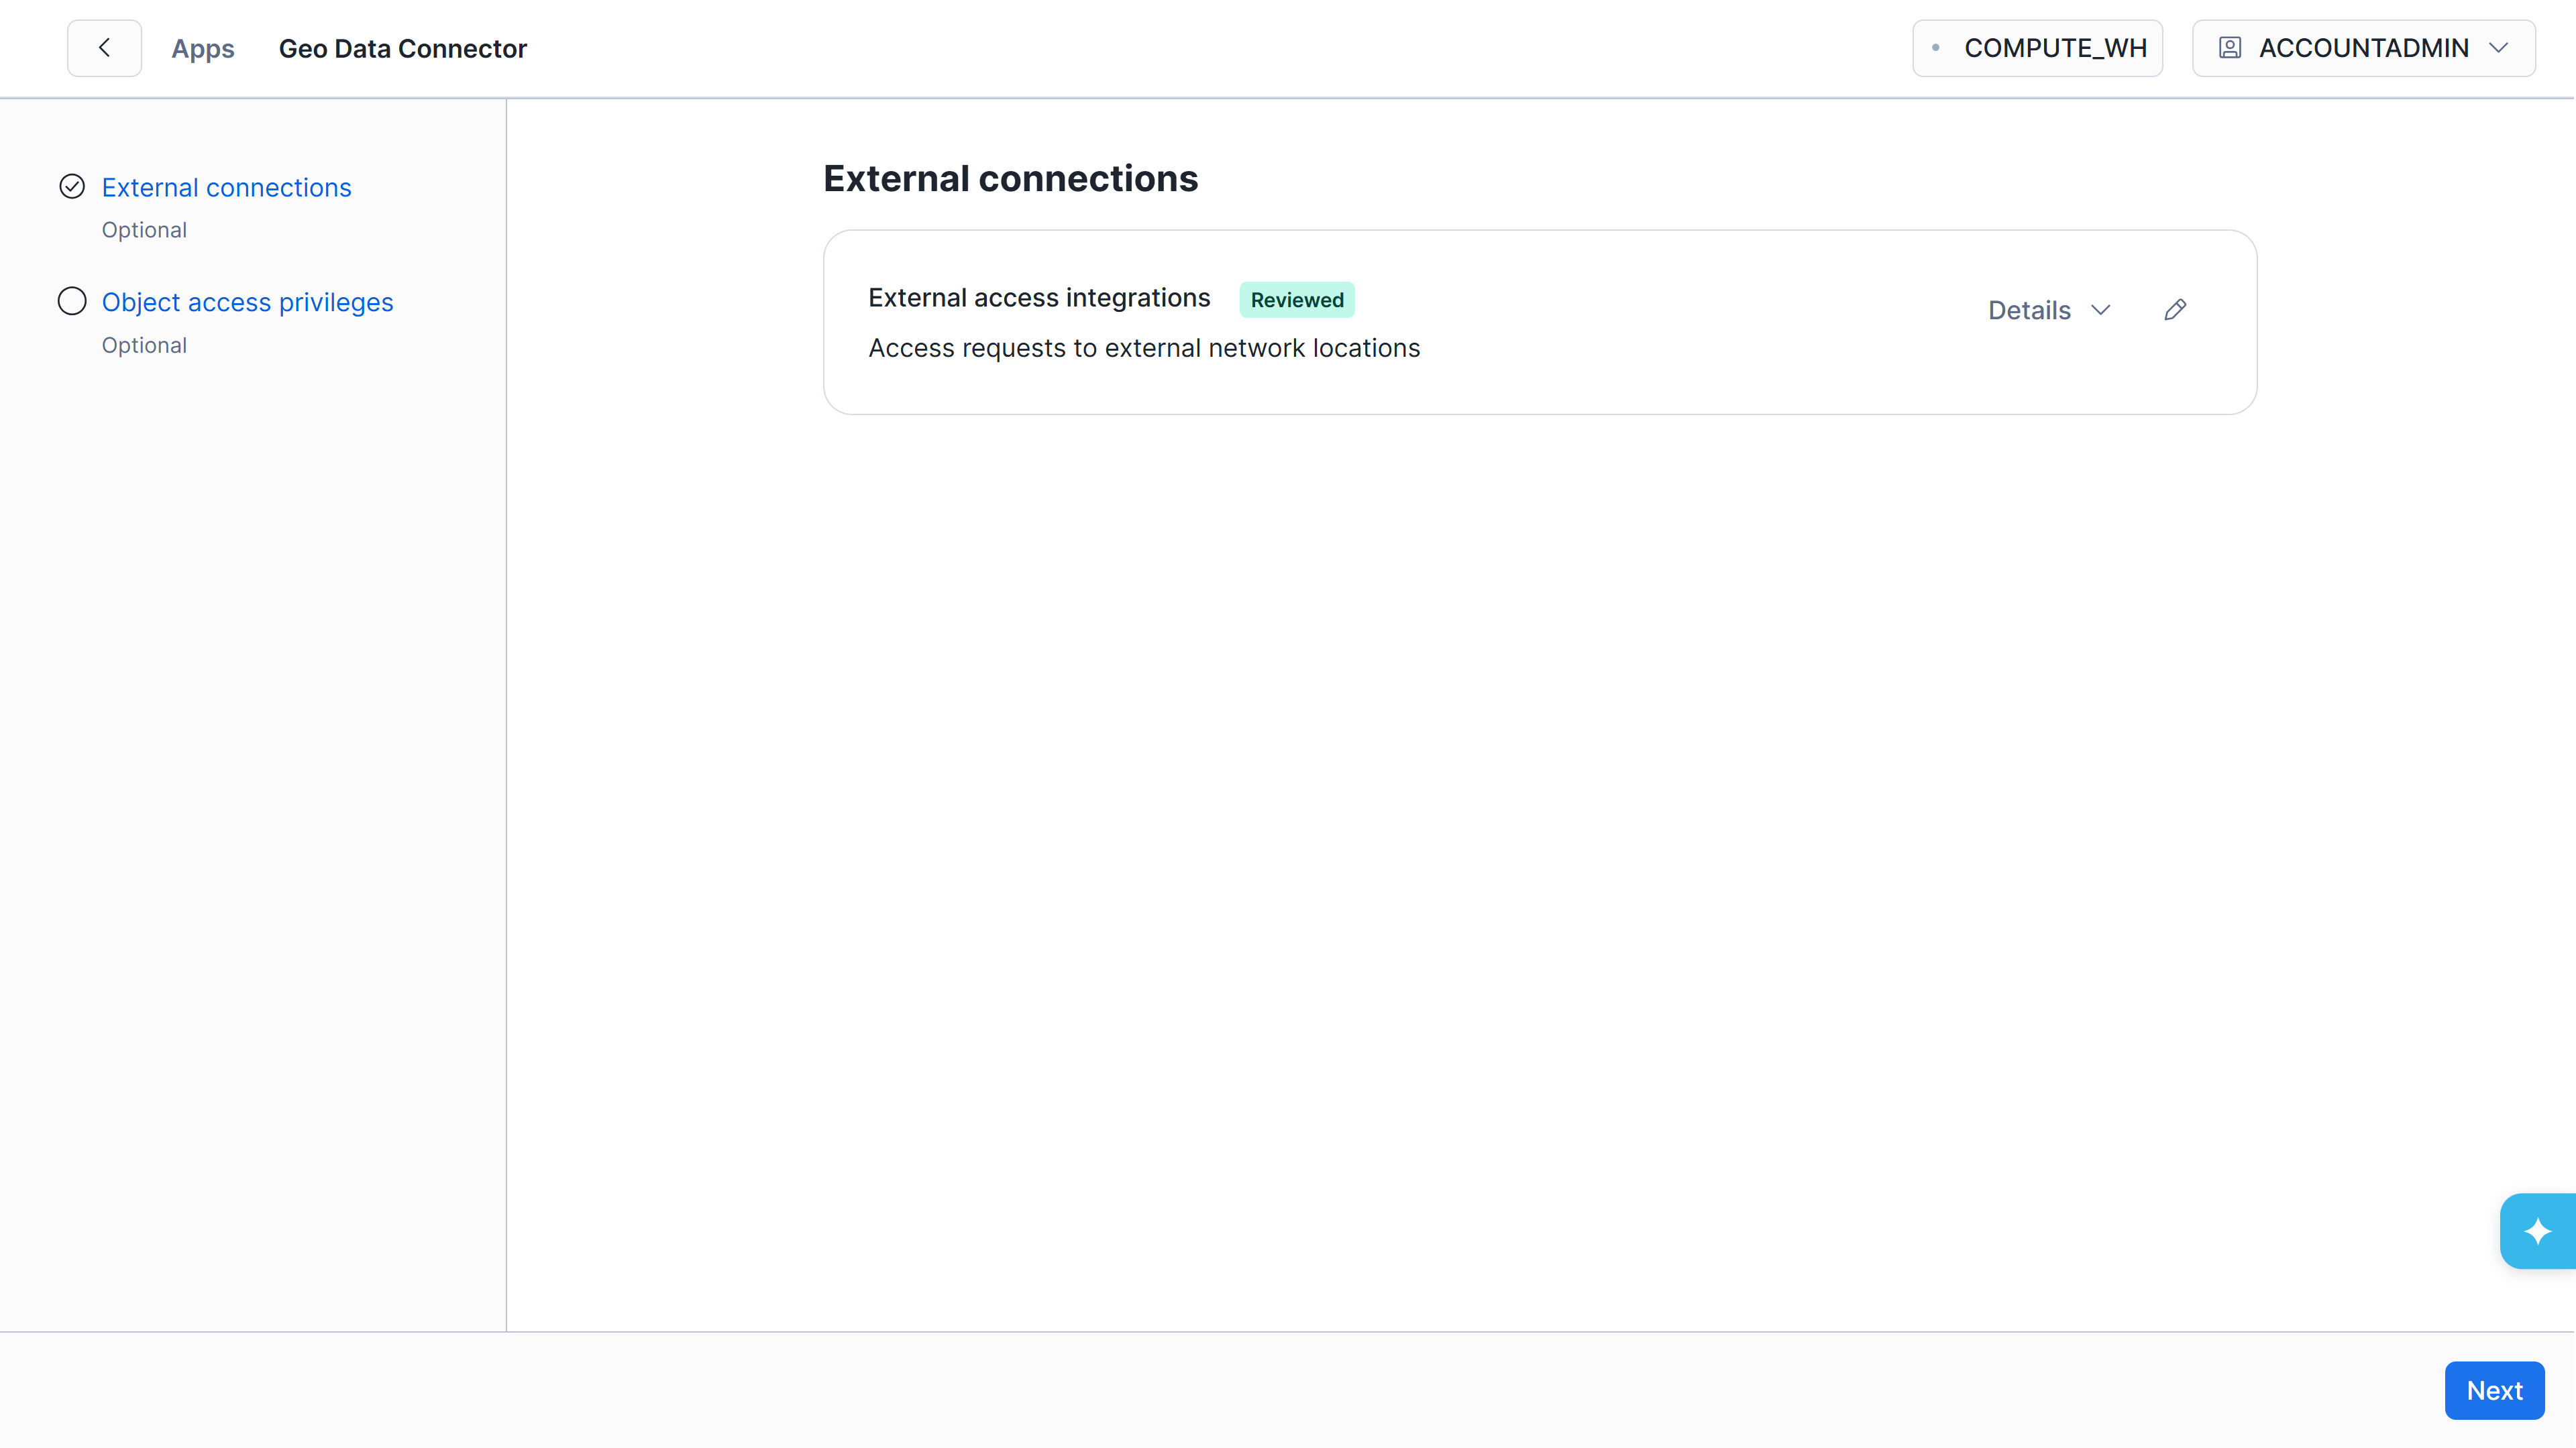
External connections page with the Reviewed badge confirming the API connection is approved
Grant Warehouse Access
The second page shows the Object access privileges configuration. The Connector needs USAGE on a Snowflake warehouse to read and update application tables and execute ingestion tasks. Click Add to assign a warehouse.
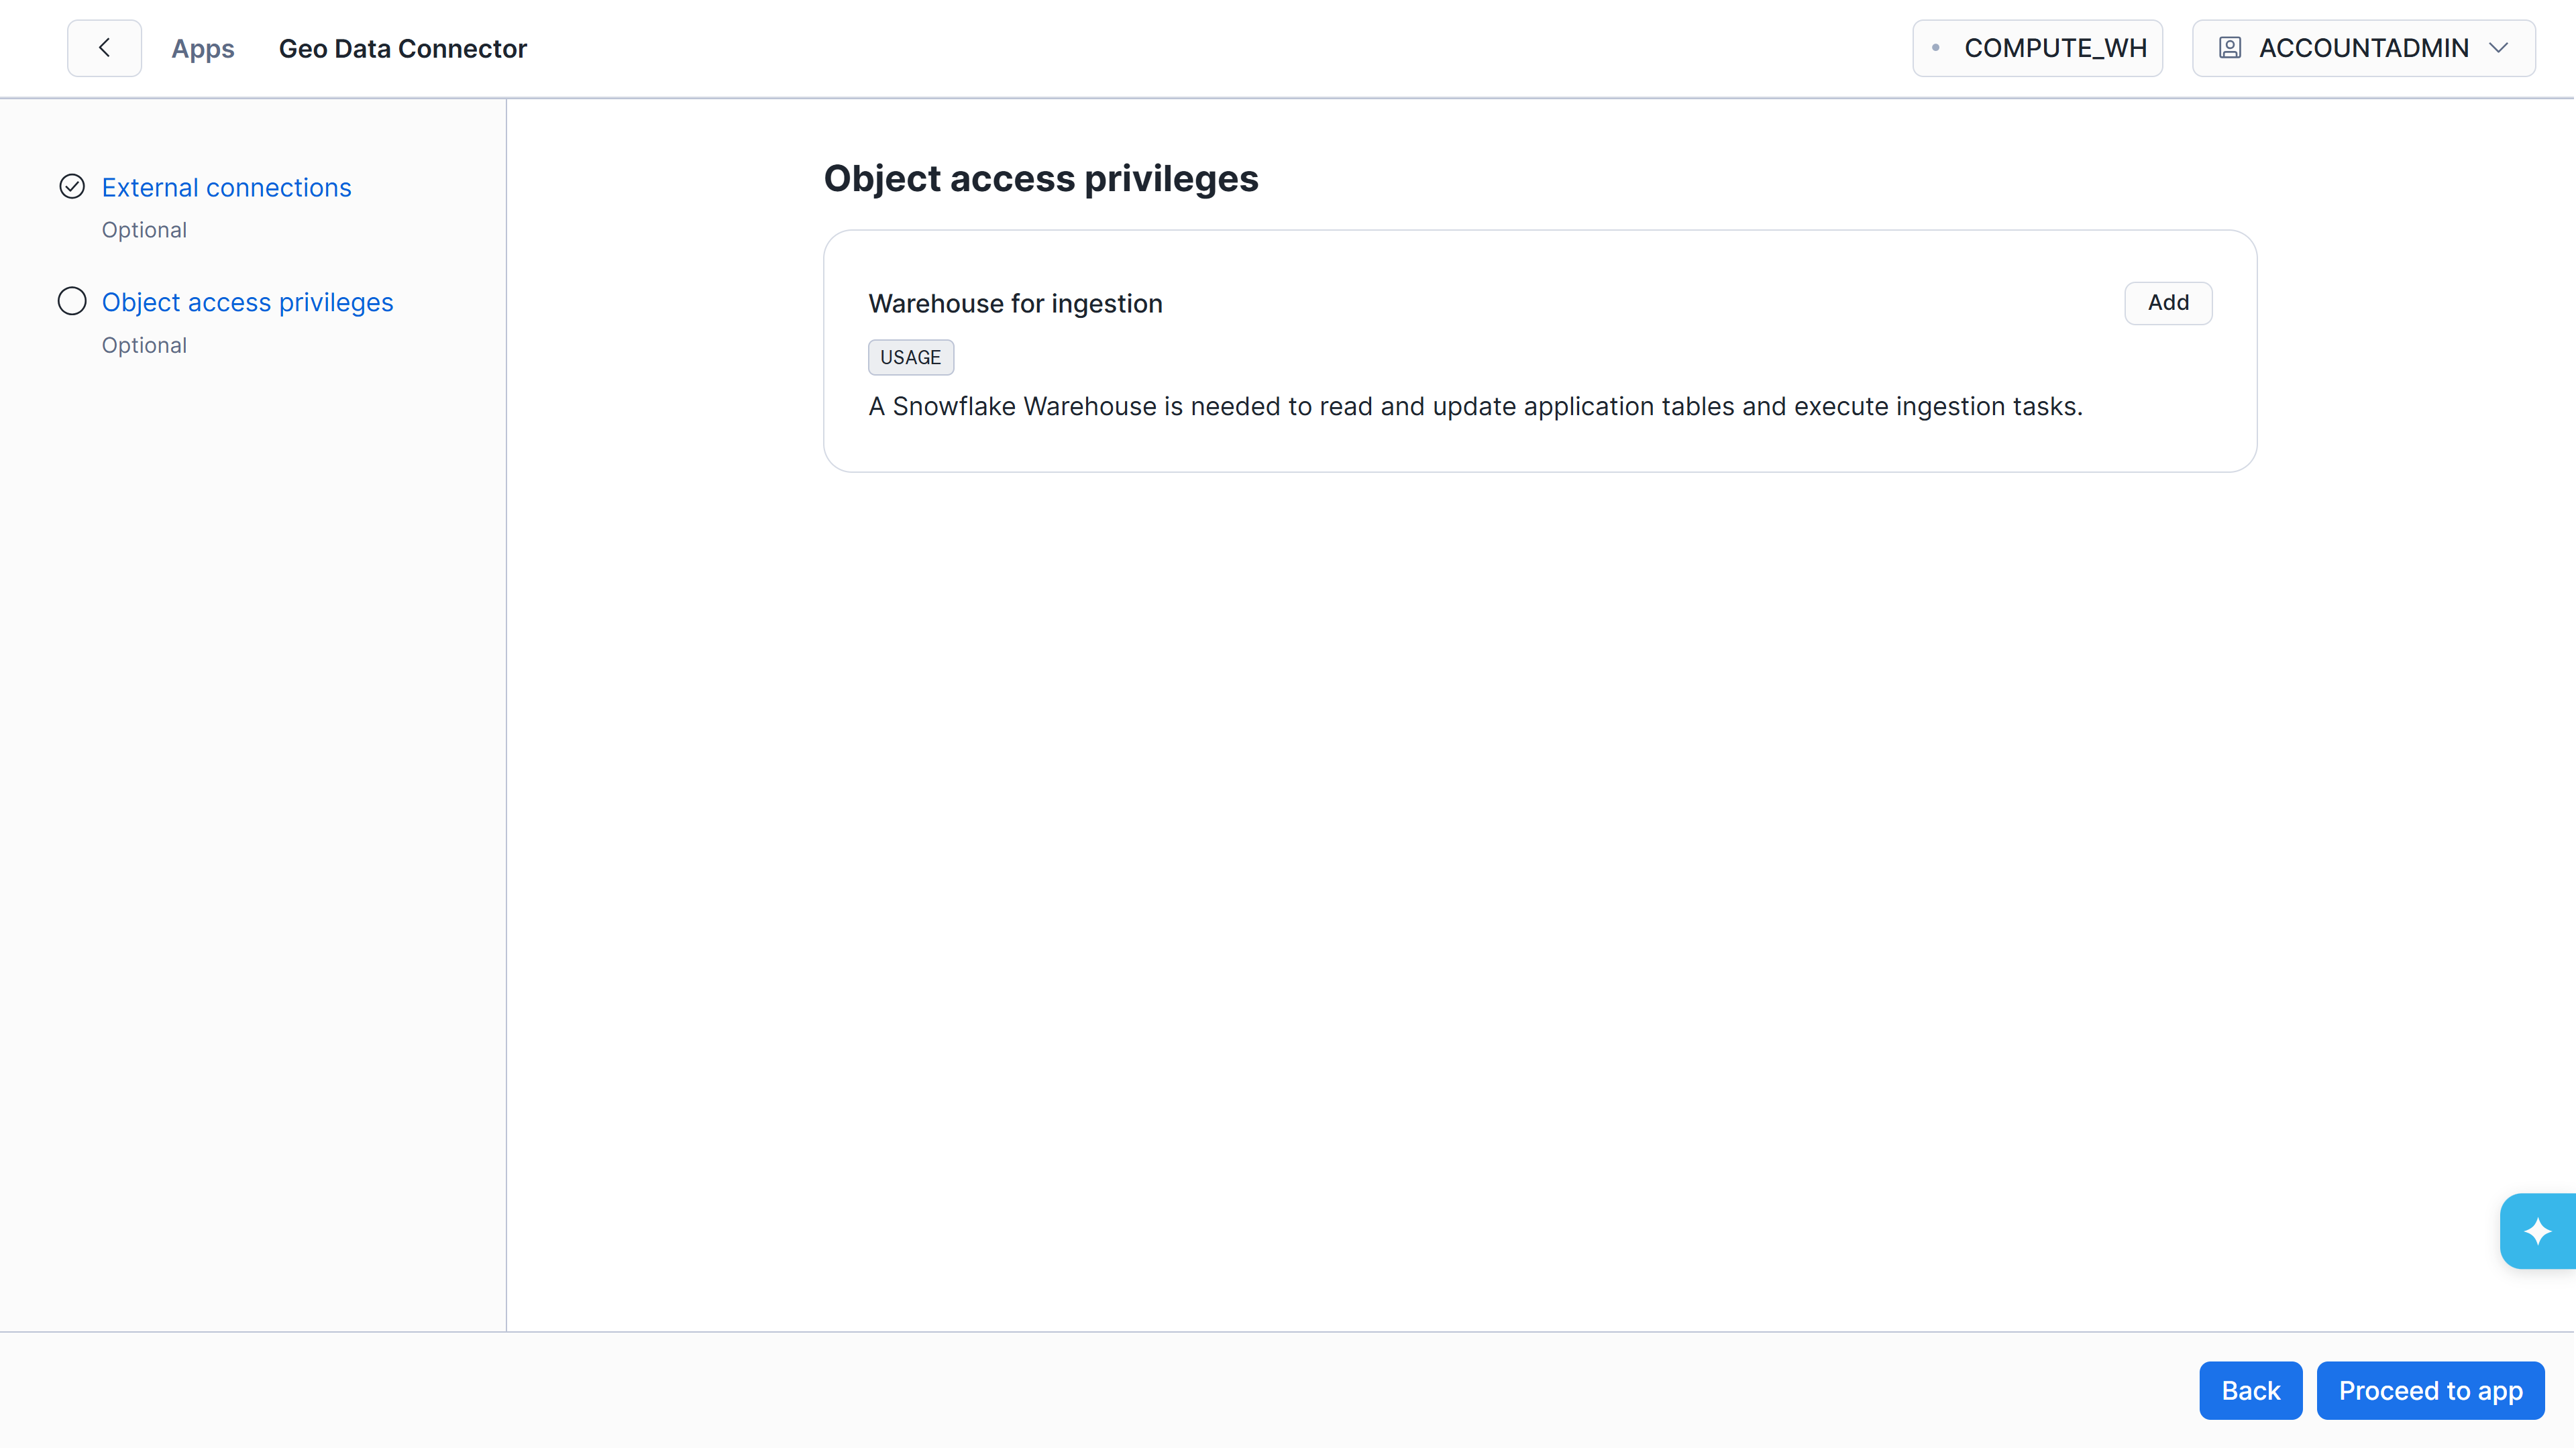
Object access privileges page showing the Warehouse for ingestion item and Add button
In the dialog, select a warehouse from the dropdown and click Save.
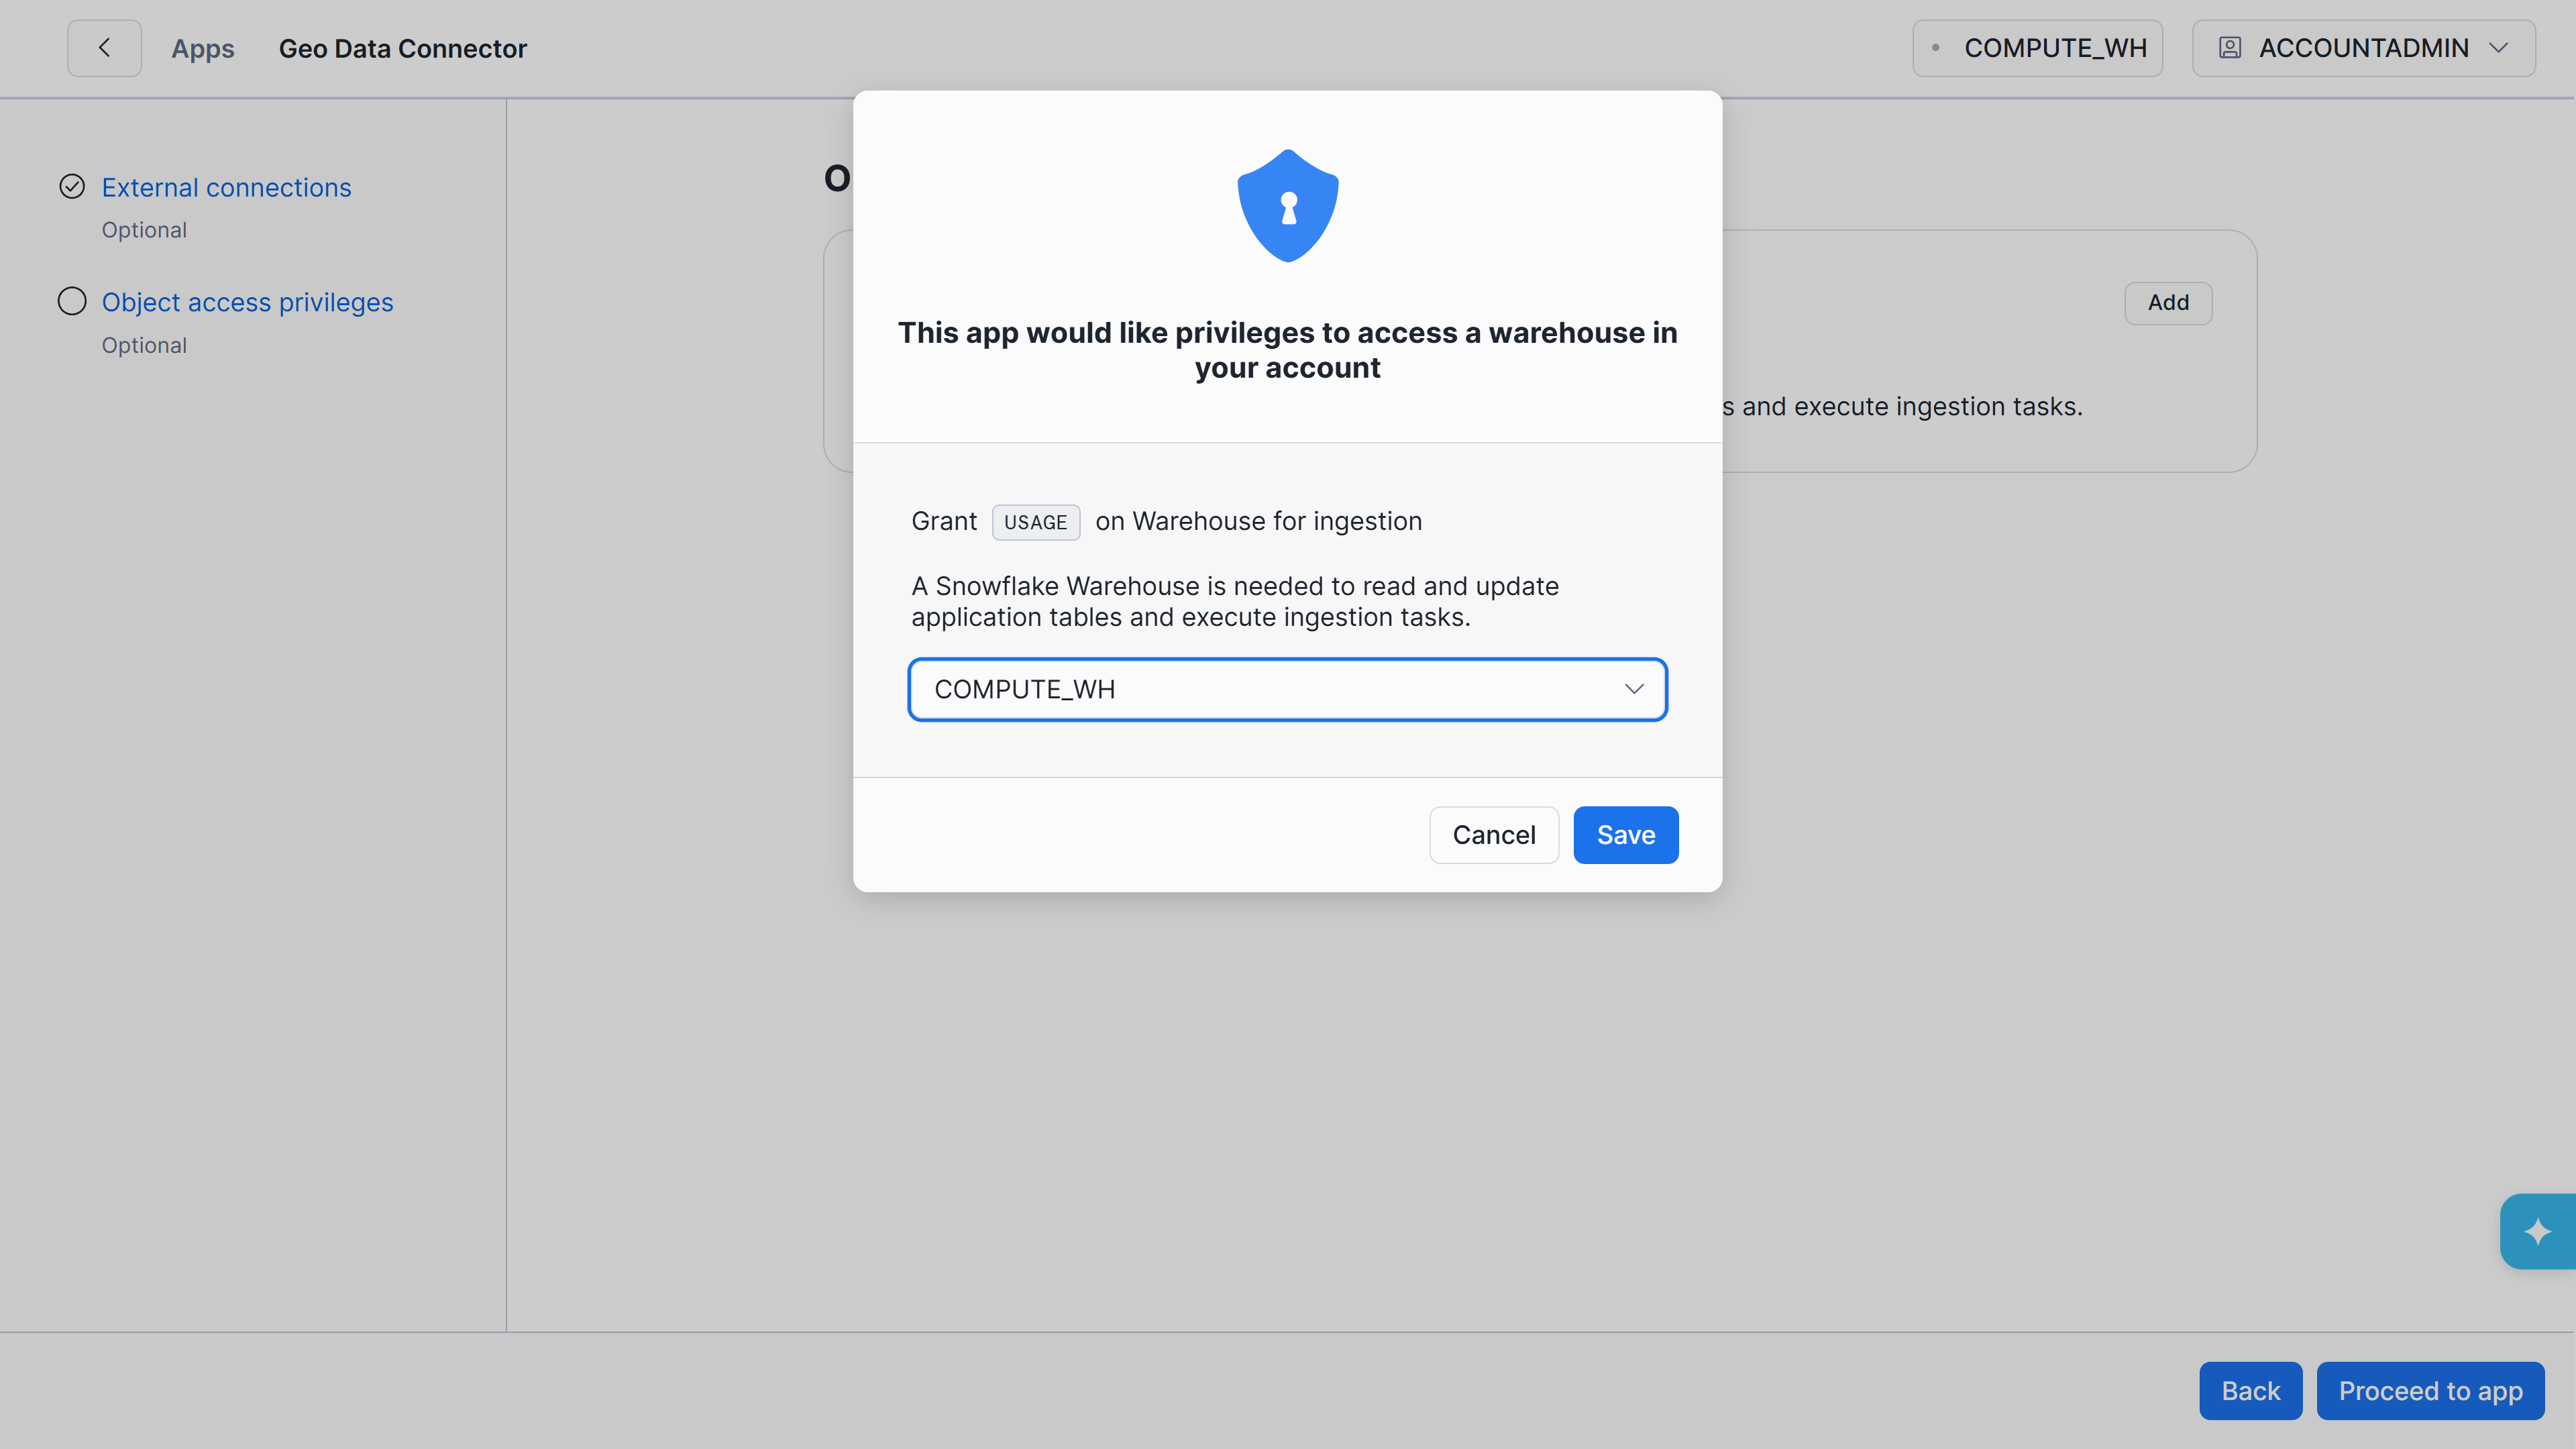
Warehouse selection dialog
After saving, the warehouse shows a Granted badge. Click Proceed to app to open the application settings.
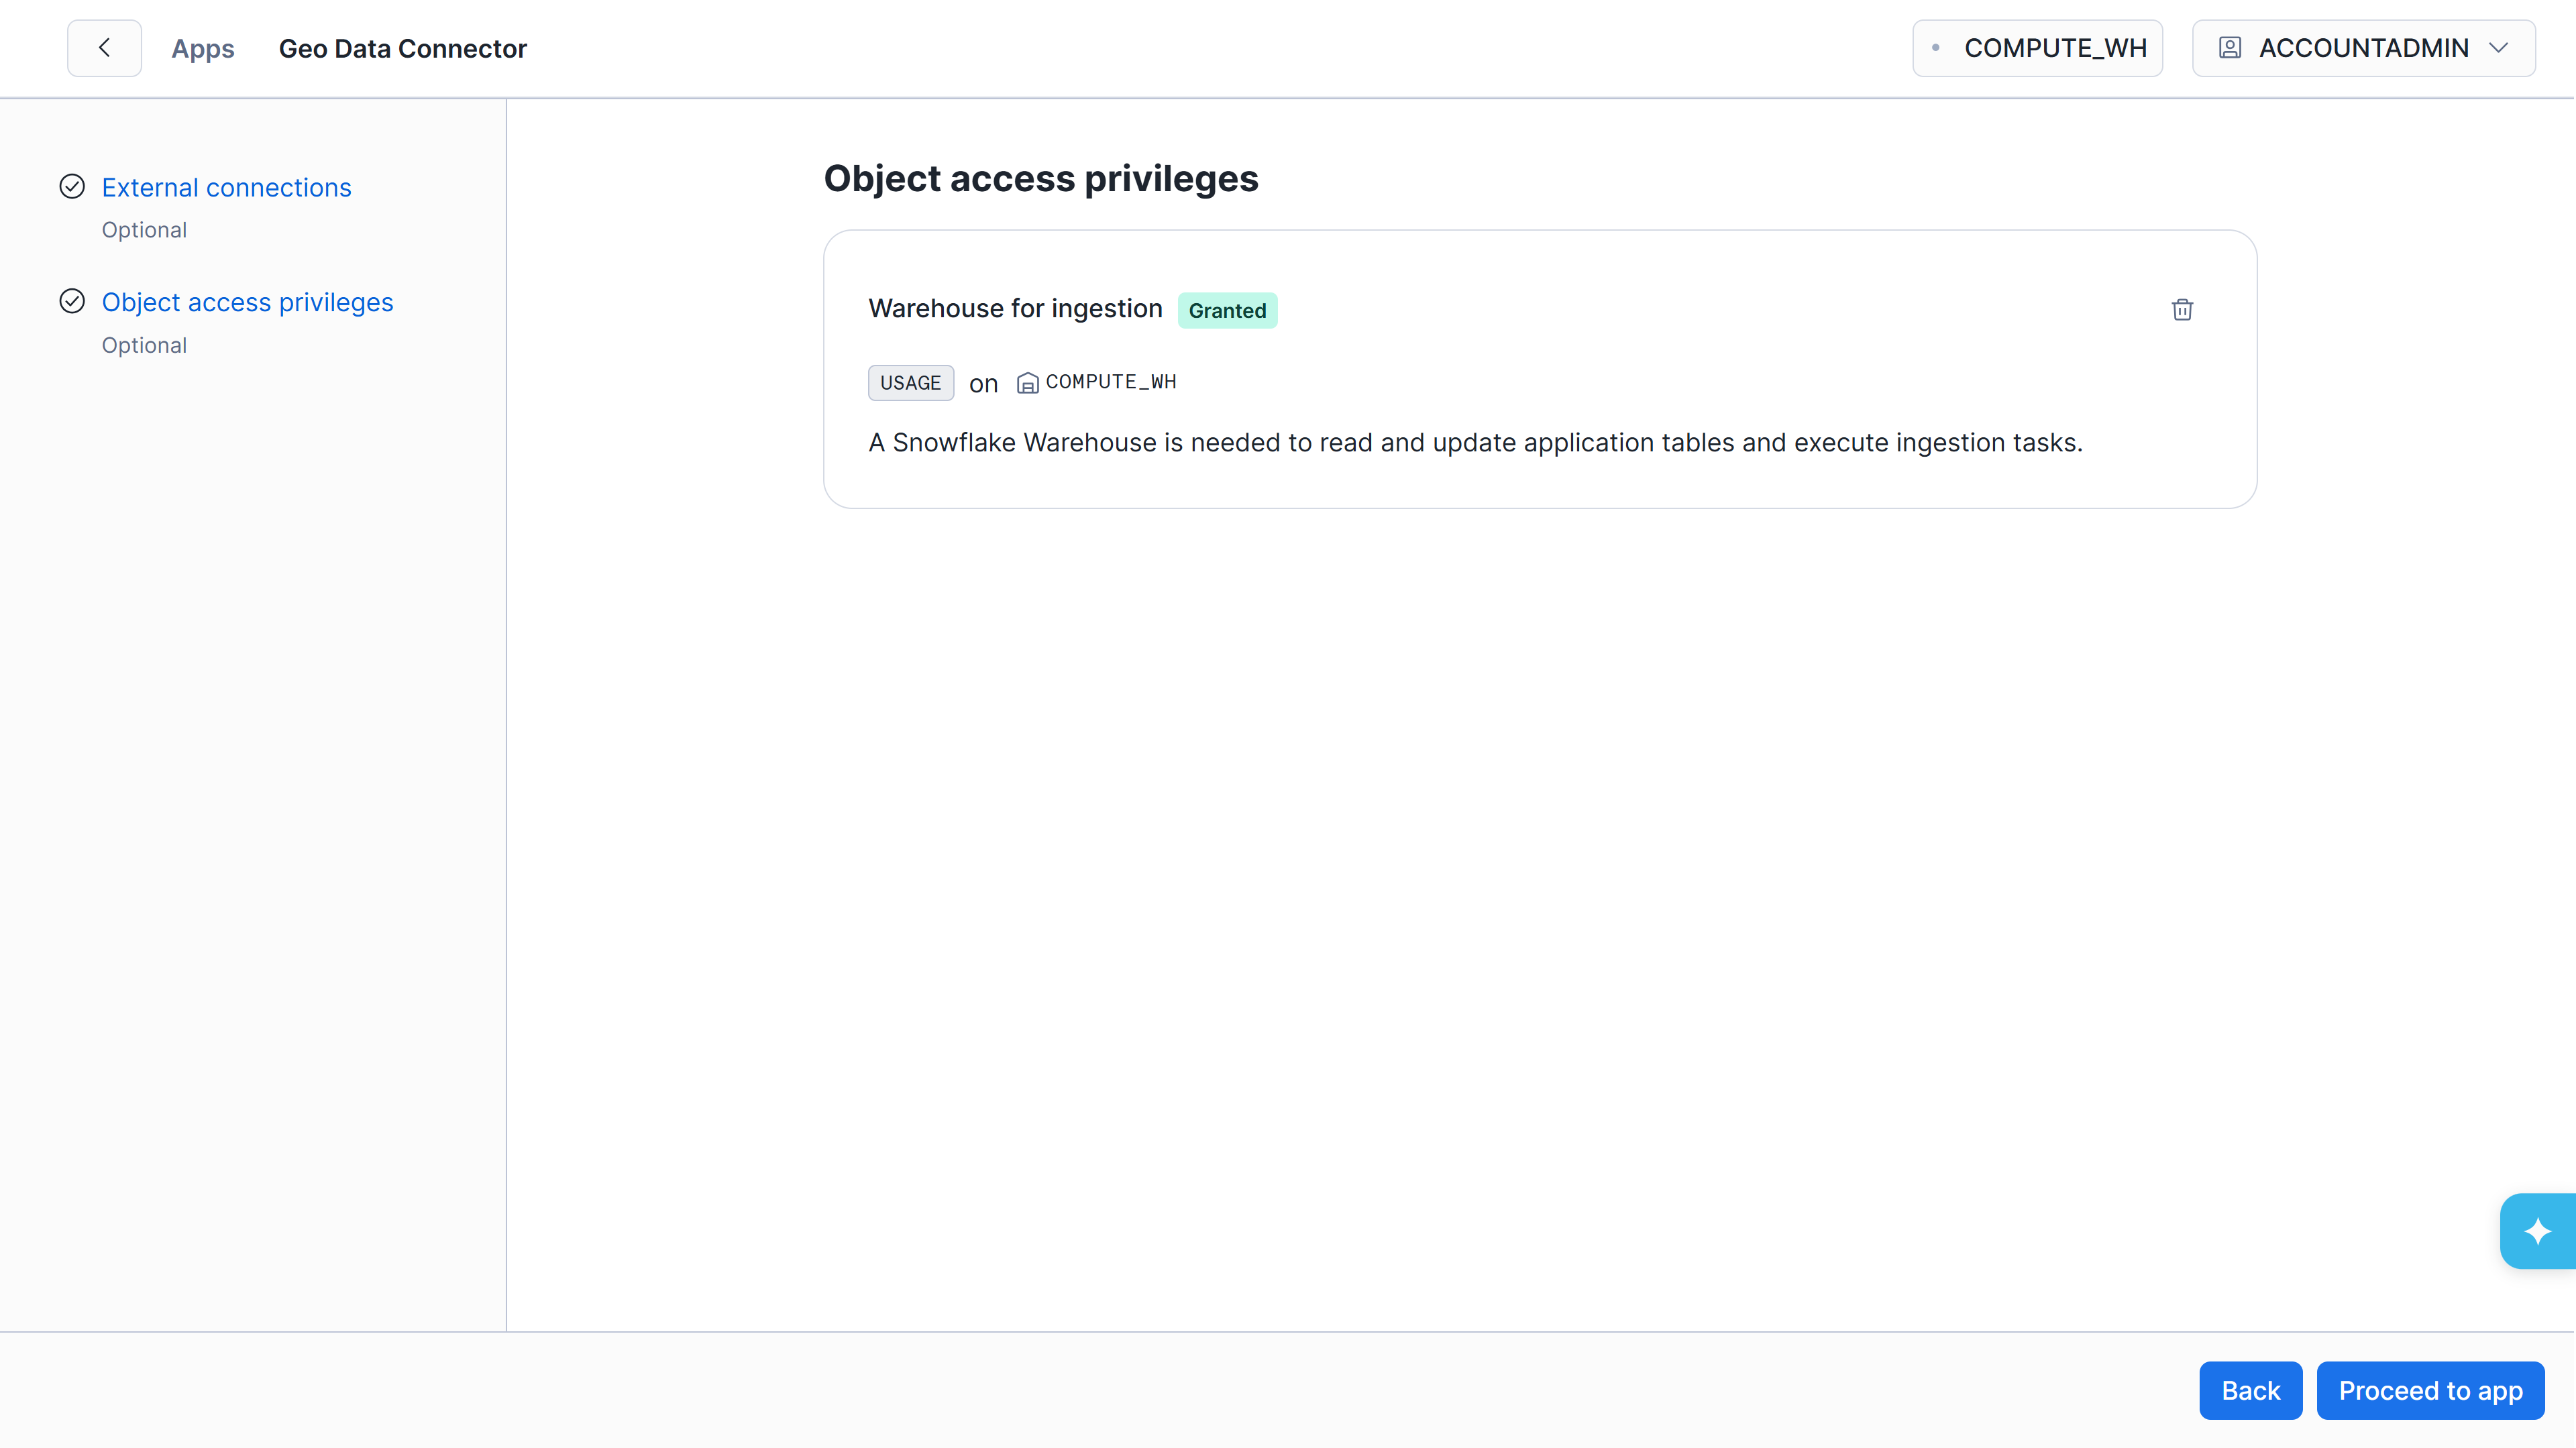
Object access privileges page with the Granted badge confirming warehouse access
Review Application Settings
Snowsight opens the Geo Data Connector application settings page. The About the app tab shows the application version, description, and key features.
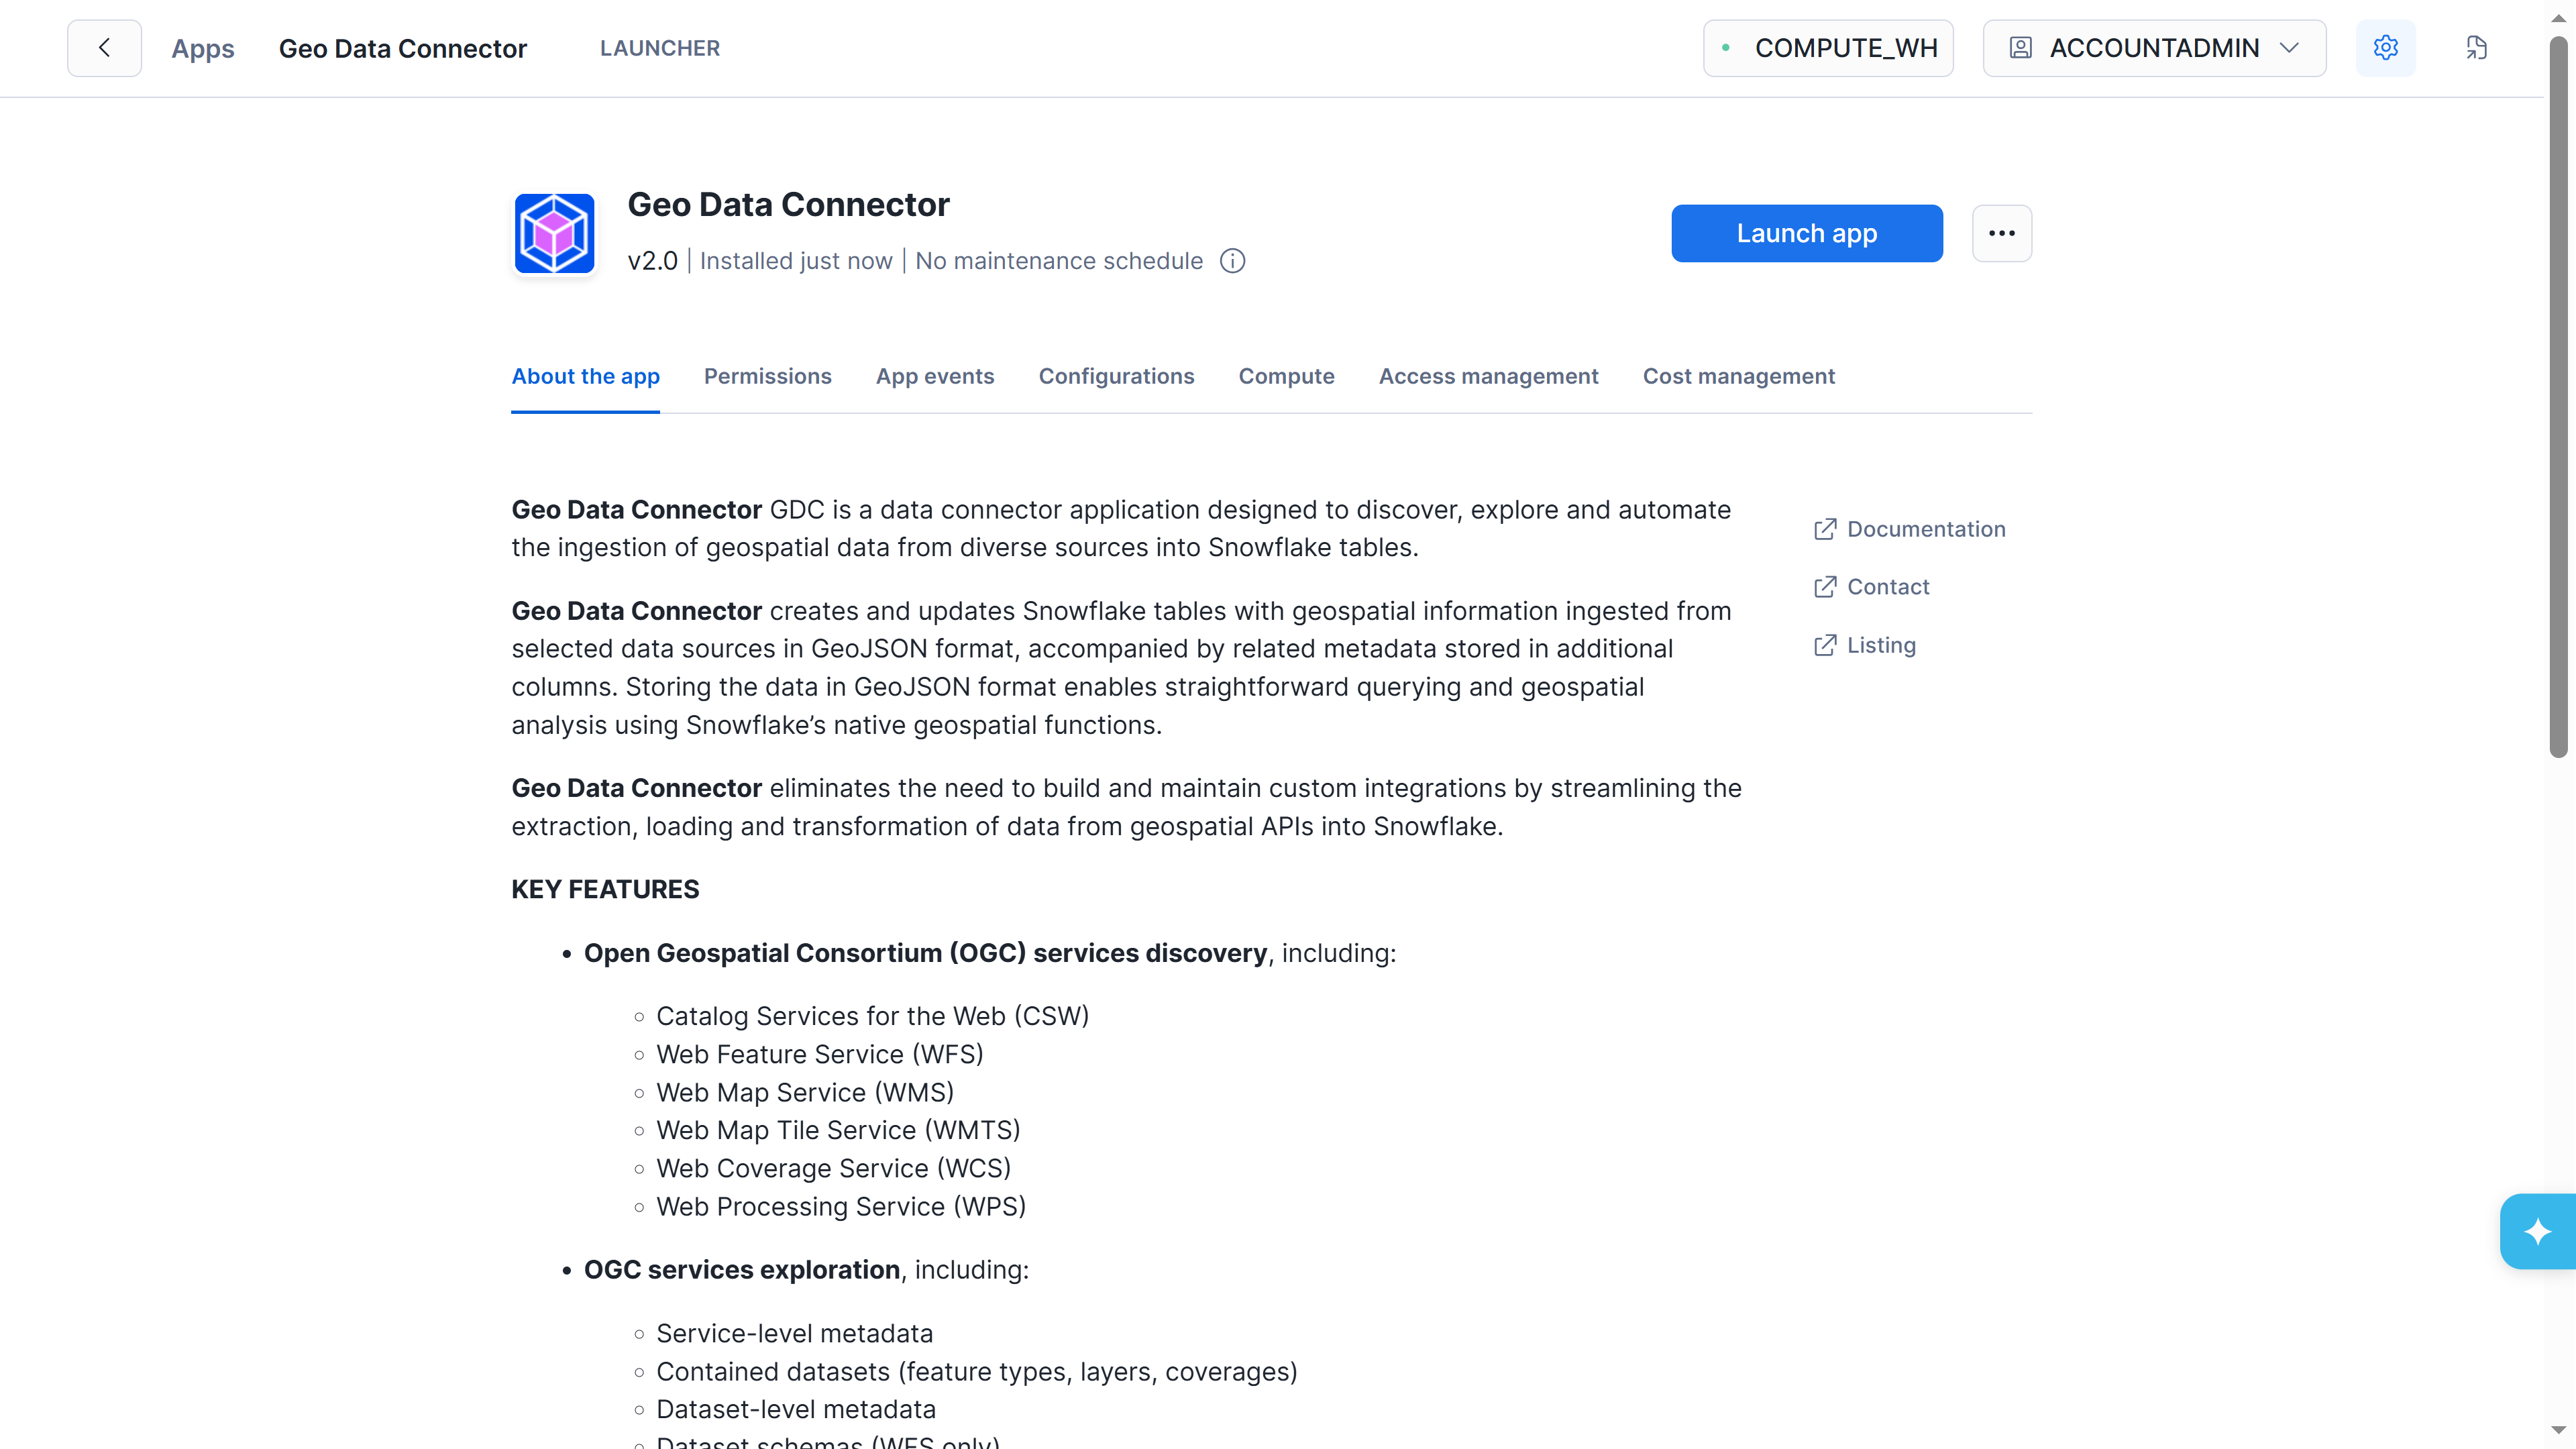
Application settings page showing the About the app tab
From here you can explore the other tabs — Permissions, App events, Configurations, Compute, Access management, and Cost management — to review and adjust settings as needed. The most important next step is mapping account roles.
Map Account Roles to Application Roles
Select the Access management tab to map your Snowflake account roles to Geo Data Connector's application roles. Click Add to create new role mappings.
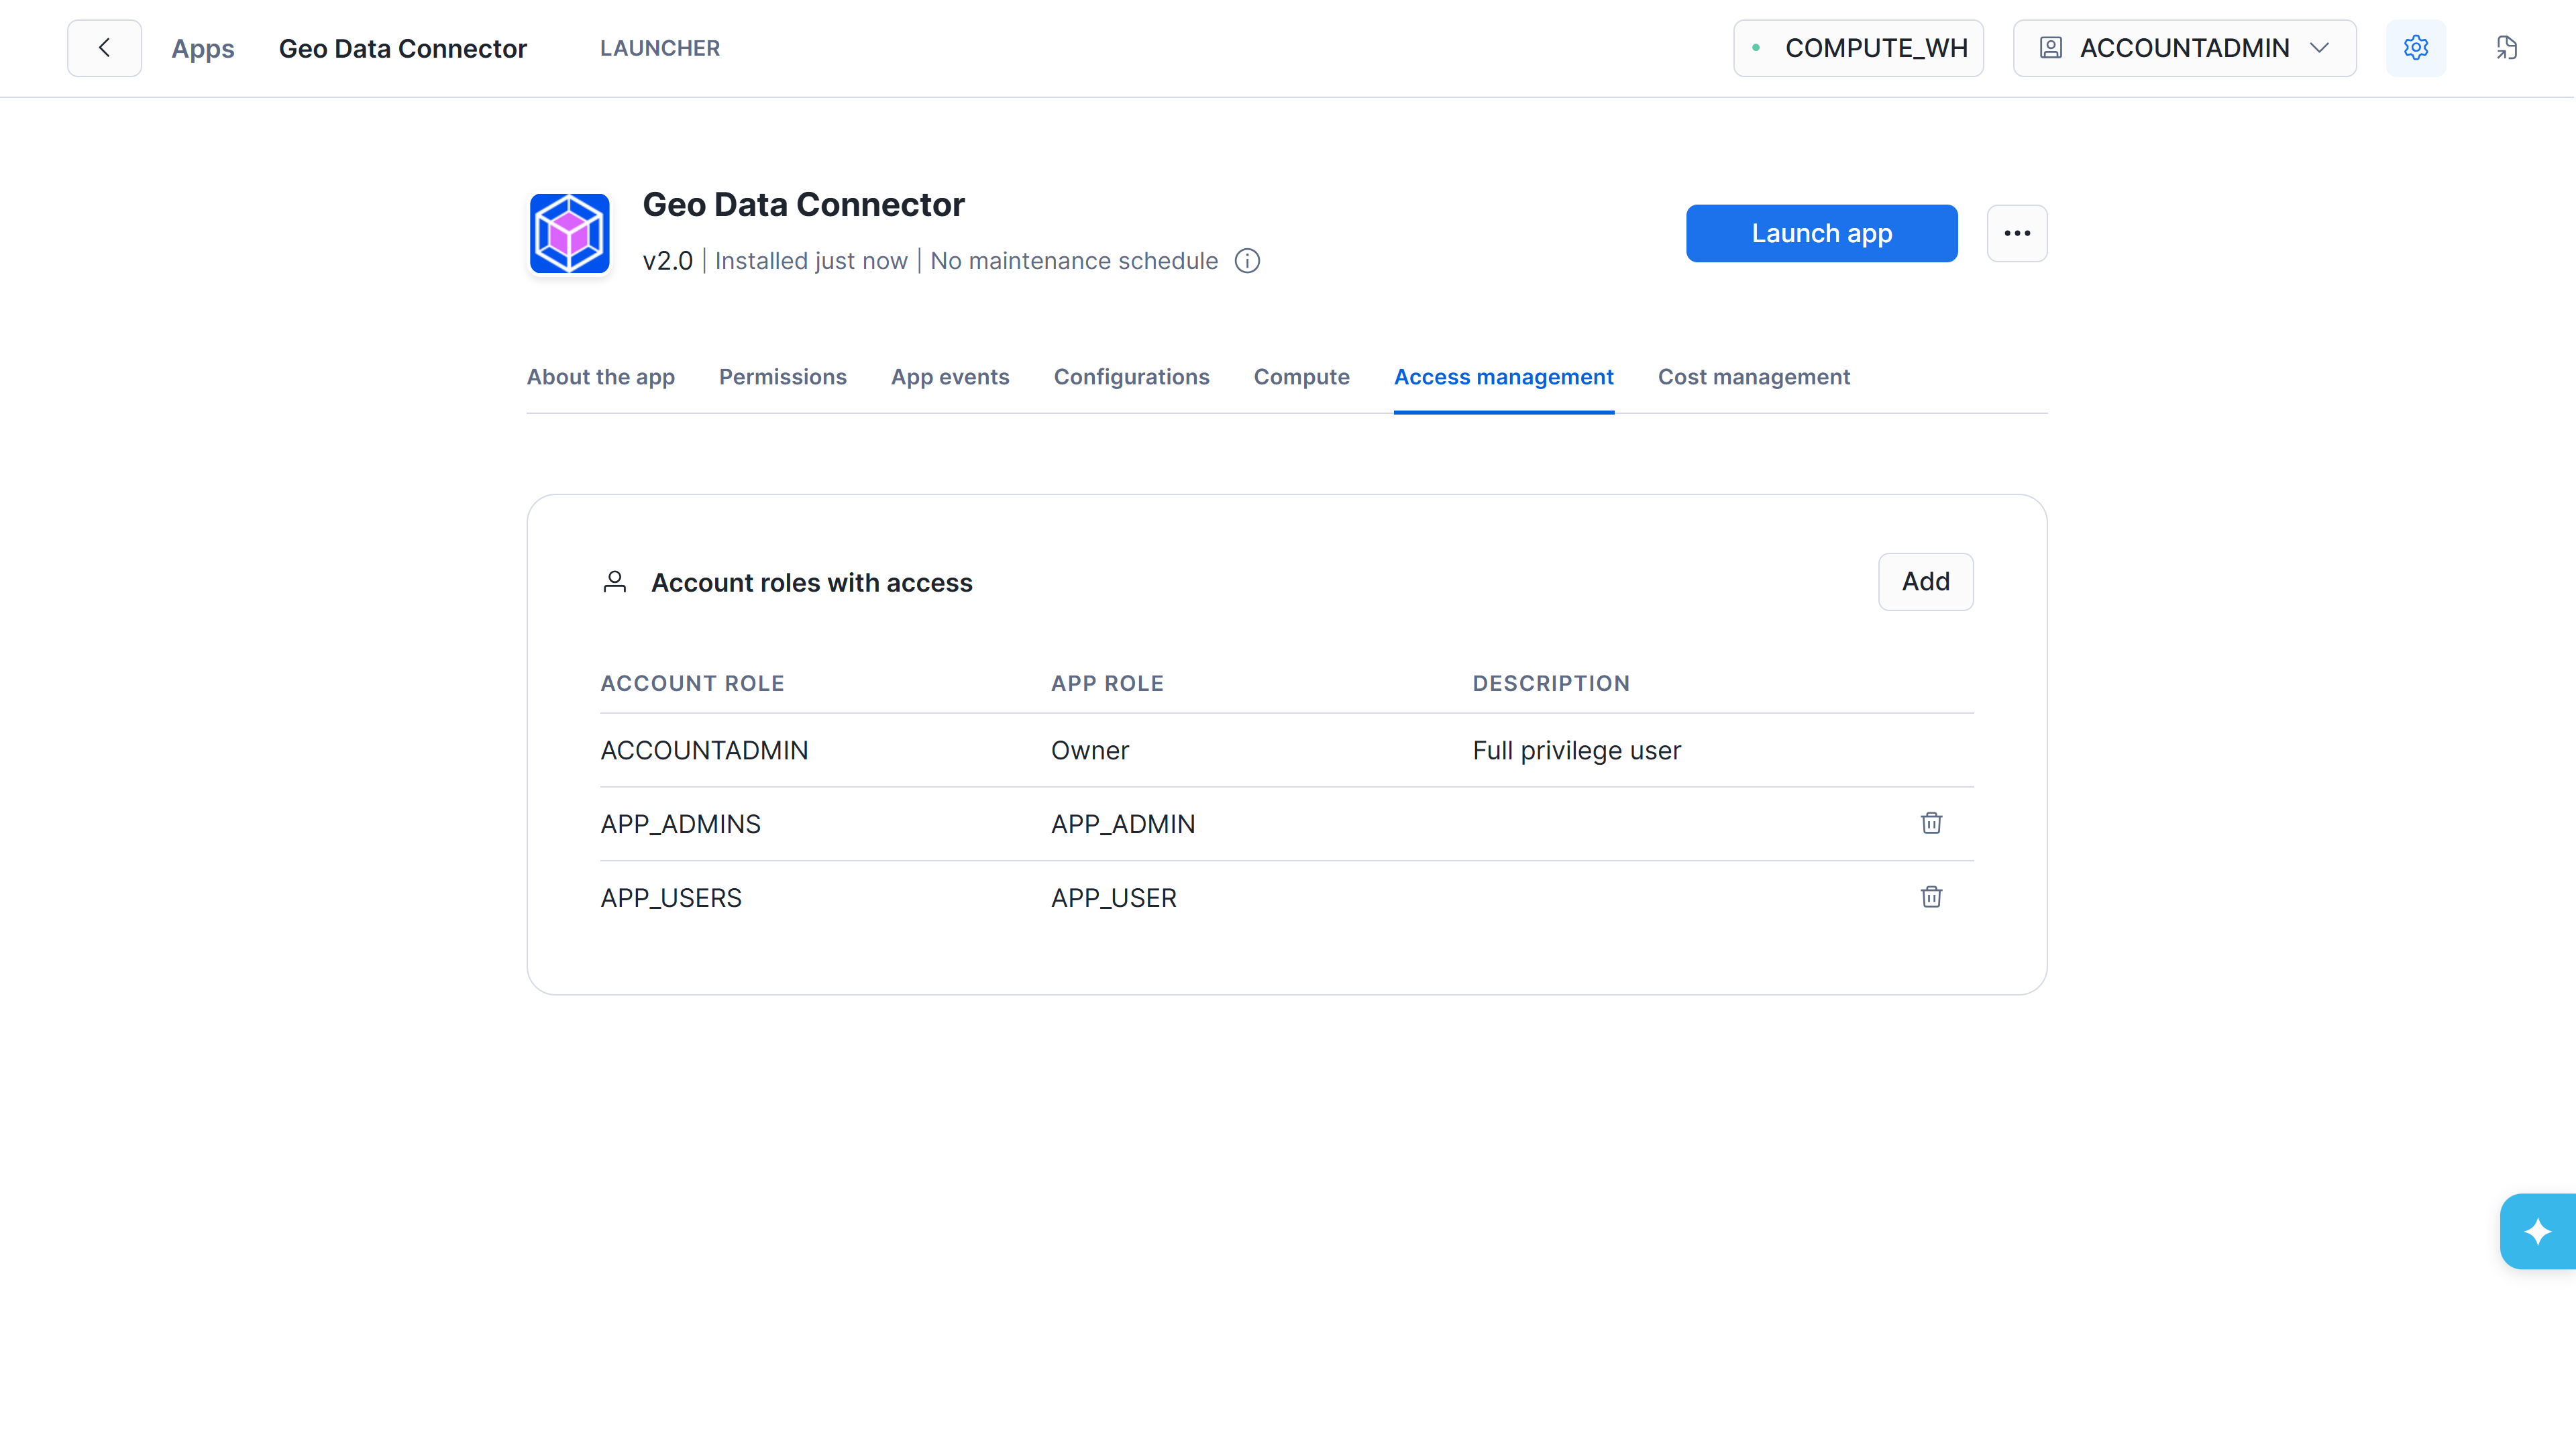
Access management tab showing account role to application role mappings
About Application Roles
Geo Data Connector defines its own application roles, separate from your account roles. To grant access, map your account roles to application roles:
| Role | Description |
|---|---|
| APP_ADMIN | Can start and stop the Connector, manage its lifecycle, and has full control over the Ingestion Target Database and all its contents (schemas, tables, views, and stages). |
| APP_USER | Can use all features described in this user guide: discovery, ingestion, and task management. Has read access to all schemas, tables, and views in the Ingestion Target Database. |
For SQL procedures available to each role, see SQL Procedures.
Configuring with SQL
Every configuration step on this page can also be performed with SQL — useful for scripted setups, automation, or configuring the Connector with an AI assistant. Replace <app_name> with the name you installed the application under, and <warehouse> with the warehouse the Connector should use.
1. Approve the external connection (equivalent to the External Connections review above). Requires the MANAGE APPLICATION SPECIFICATIONS privilege, held by SECURITYADMIN by default:
sql
SHOW SPECIFICATIONS IN APPLICATION <app_name>;
-- Use the SEQUENCE_NUMBER value shown for GDC_API_SPEC:
ALTER APPLICATION <app_name> APPROVE SPECIFICATION GDC_API_SPEC SEQUENCE_NUMBER = 1;The specification status changes from PENDING to APPROVED. If the connection details change in a later application version, a new sequence number appears and needs to be approved again.
2. Grant warehouse access (equivalent to assigning a warehouse above). Requires USAGE on the warehouse and the APP_ADMIN application role:
sql
CALL <app_name>.SETUP.REGISTER_SINGLE_CALLBACK(
  'WH_INGESTION', 'ADD',
  SYSTEM$REFERENCE('WAREHOUSE', '<warehouse>', 'PERSISTENT', 'USAGE')
);3. Start the Connector (equivalent to launching the application in Step 8). Requires the APP_ADMIN application role:
sql
CALL <app_name>.SETUP.START_APP();
-- Returns the Connector's URL once it is running:
CALL <app_name>.SETUP.APP_URL();4. Set the Ingestion Target Database (equivalent to configuring it on the Settings page). Requires the APP_ADMIN application role:
sql
CALL <app_name>.SETUP.CONFIGURE_INGESTION_DB('<database_name>');If you ran START_APP before completing steps 1 and 2, restart the Connector so the changes take effect:
sql
CALL <app_name>.SETUP.SUSPEND_APP();
CALL <app_name>.SETUP.START_APP();Previous: Step 6: Complete Installation